
Water TD Skill Tree: Nodes, Costs and Branches
A map of the Water TD skill tree: the three currencies, the 110 to 3,014 BASIC node costs, the build diamonds, and the order that wastes the least.
The Water TD skill tree is the game's real progression system. It is one screen, it is global, and it holds more than 170 upgrades across turrets, abilities and support nodes. This page is a map of that screen: what each kind of node costs, where the branches go, and which purchases pay for themselves.
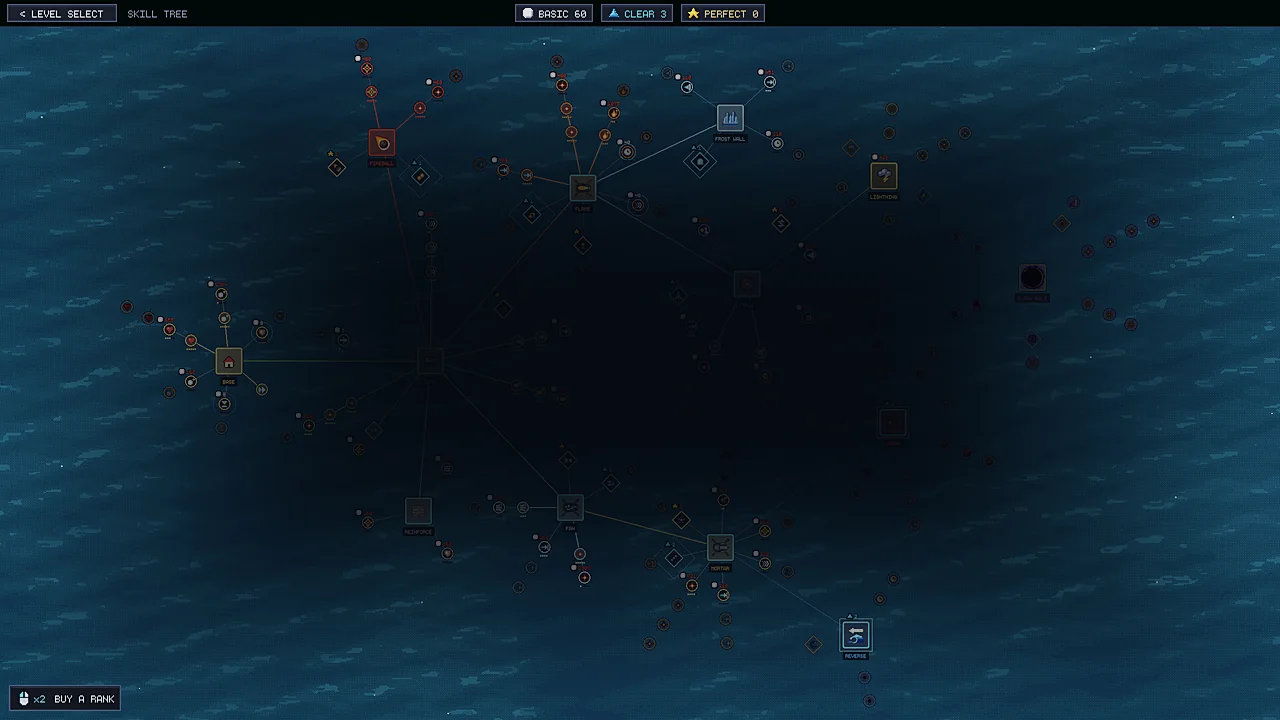
The three currencies
The top bar of the skill tree shows three counters:
| Currency | What it pays for | How it is earned |
|---|---|---|
| BASIC | Ordinary node ranks | The broad currency of normal play |
| CLEAR | Build diamonds marked ▲1 / ▲2 | Clearing levels |
| PERFECT | Build diamonds marked ★1 / ★2 | Clearing levels without the base taking a hit |
The distinction matters because the three do not convert into each other. BASIC buys depth in nodes you already own; CLEAR and PERFECT buy the behaviours that change how a turret fights. A player with a thousand BASIC points still cannot buy a build diamond.
The currency labels, the ▲/★ diamond markers and the ×2 buy-a-rank control are all visible on the skill tree screen in the launch build. Exact BASIC income rates per level are not published by the game.
Node costs
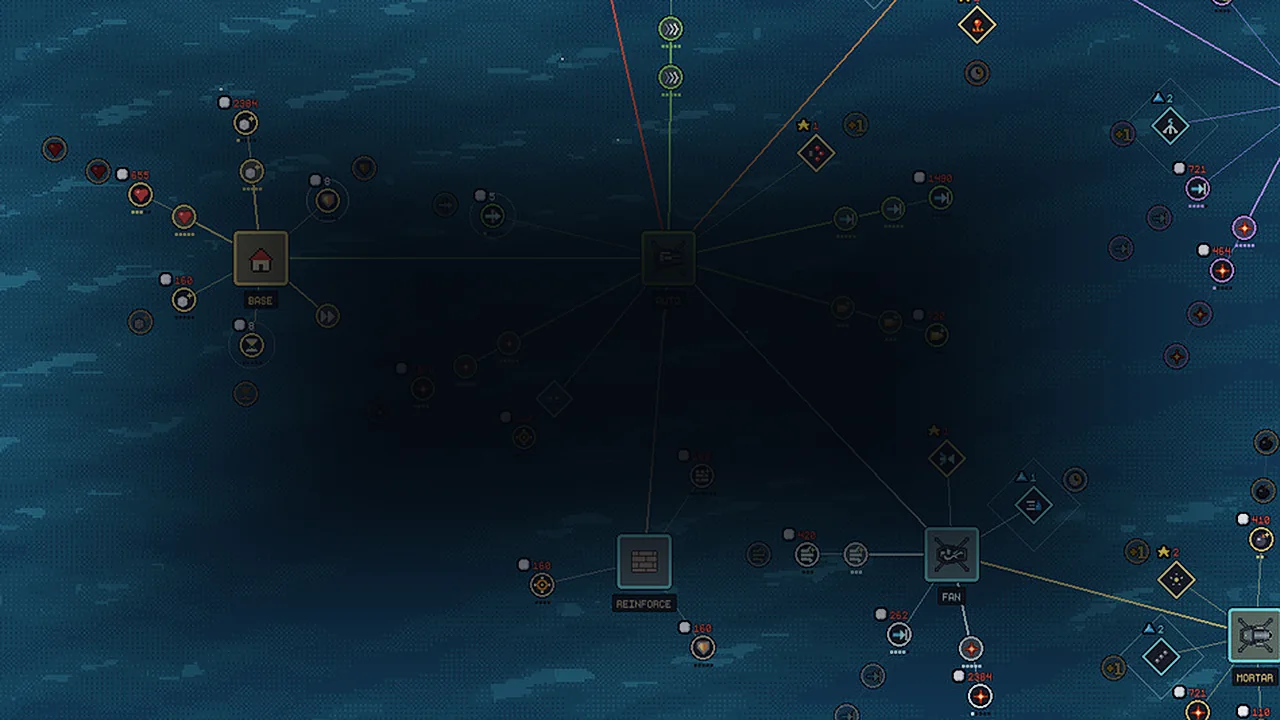
The BASIC costs printed on the tree in the launch build run from 110 to 3,014. They are not a linear ladder; the first rank of a cheap node is affordable after a level or two, while the top-end ranks are long-term goals.
Cheap nodes cluster near the base and the starting turret. Expensive nodes sit at the ends of long branches, which is the tree telling you where the developer expects a mature save to be.
The shape of the tree
The tree is organised around a hub at the BASE node, with branches radiating outward:
- BASE — the defensive hub. Its branches add base health and base protection, which is the only way to make your 200 HP last longer.
- Turret branches — AUTO, FLAME, TESLA, LASER, FAN and MORTAR, each with ranks and at least one build diamond.
- Ability branches — FIREBALL, FROST WALL, LIGHTNING, REVERSE and BLACK HOLE, purchased with BASIC but gated behind position in the tree.
- Support nodes — REINFORCE, a three-rank wall branch, plus utility nodes that affect range, economy and ability behaviour.
Build diamonds sit on short spurs off the turret nodes. Their ▲ or ★ marker tells you the currency; their number tells you how many of that currency the diamond costs.
The ×2 buy-a-rank button
The bottom left of the tree screen has a ×2 buy-a-rank control. It takes a node to its next rank without requiring you to walk the tree again, which turns a long shopping session into a couple of clicks. It also makes the depth-versus-breadth decision slightly cheaper to execute, so there is no excuse for leaving a node you use every wave at rank one.
The order that wastes the least
- Two ranks in AUTO damage. You place AUTO in every level, so this is the highest-coverage purchase on the tree.
- BASE health. A wave that reaches your base is a wave your turrets failed to kill, and more HP converts those failures into narrow wins.
- FLAME unlock plus one rank. Close-range insurance against breaches.
- One build diamond on whichever turret you place most.
- A second turret family that answers the map shape you keep losing to: TESLA for wide fronts, LASER for deep channels, MORTAR for water behind terrain.
- Ability upgrades. Fireball first, then Frost Wall, then the situational ones.
Mistakes that cost the most
Buying every unlock before ranking anything. A tree full of rank-one nodes is a tree that does nothing well. The over-170 node count is a menu, not a checklist.
Spending CLEAR on turrets you do not place. CLEAR is slow to earn. A build diamond on MORTAR is wasted if you never build a MORTAR.
Ignoring BASE. Base health is the resource you cannot regenerate within a level. A couple of BASE ranks changes what a failed wave costs you.
Chasing the expensive tail early. The 3,014 BASIC nodes are for a save that has already cleared the campaign. Buying one of them instead of six cheap ranks is a net loss for dozens of levels.
The builds guide→ explains the diamond nodes, upgrade points→ explains the currencies, and achievements→ lists the CLEAR and PERFECT sources.
Frequently Asked Questions
How many upgrades are in the Water TD skill tree? The store page says over 170. The count includes turret ranks, ability ranks, support nodes and build diamonds.
Is the skill tree shared between levels? Yes. It is a single global tree, and points earned in any level can be spent on it.
Can I reset the tree? No reset option is documented in the 1.0.1 build. Treat purchases as permanent.
What is the cheapest useful node? A 110 BASIC rank near the base or the starting turret. Those cheap early ranks are where a new save should spend first.
The 1.0.1 patch changed several node costs and effects, so check node prices against the official patch notes ↗ before planning a tree.
Sources
Official source: Over-170-upgrades description: Water TD store page ↗ Official source: Node and currency labels: skill tree screen, launch build Official source: Balance and cost changes: Water TD 1.0.1 notes ↗